This article will teach you how to blur the background in Adobe Lightroom. It’s a useful process to know to improve your photos.
A typical rookie photographer’s mistake is to focus so much on your subject that you lose track of what is around it. And sometimes, you take photos where the background distracts from your subject.
So we take you through each editing stage in Lightroom Classic to add blur for cases like this. (We show you three ways, depending on your version of Lightroom). Adding background blur will help make your subjects stand out better.
[ExpertPhotography is supported by readers. Product links on ExpertPhotography are referral links. If you use one of these and buy something, we make a little bit of money. Need more info? See how it all works here.]
When to Blur the Background in Lightroom
Of course, it’s always easier if you don’t need to make this adjustment in post-processing at all. Getting it right at the time of shooting can save you the work.
The sooner you learn to pay attention to a subject’s surroundings while shooting, the better. There are two details to look for in general.
1. If the subject is in the background, the foreground might contain an element of interest. But it shouldn’t distract from your subject.
2. If the subject is in the foreground, the background should not be so distracting that it diverts the viewer’s eyes.
Sometimes it is possible to fix things up in post-production. You can add interesting elements in the foreground, thus creating a composite image. Or you can blur the background. So it’s less distracting and makes your subject stands out more.
Read on to learn how to blur a distracting background in Lightroom. And if you want to know more about how to get it right straight out of the camera, check out the bonus section at the end.
An Example of When to Blur the Background
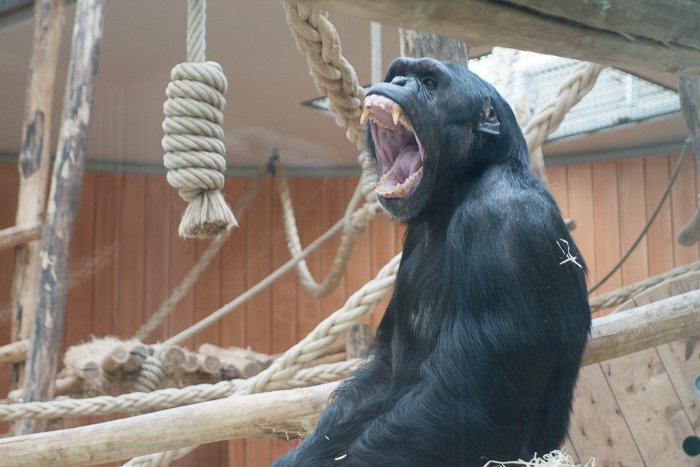
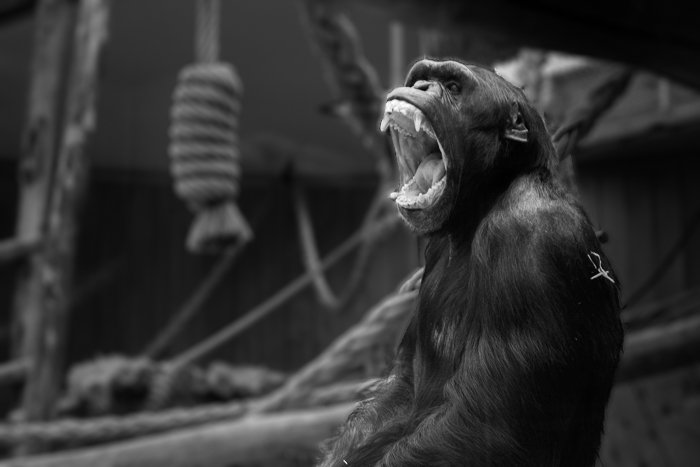
Let’s consider this image of a gorilla I shot at a zoo using my Sony RX100 Mark II.
This RX100 Mark II is a great compact camera to walk around with. The only downside is its unimpressive f/4.9 minimum aperture value when zooming in. It’s not ideal for creating an impressive background blur.
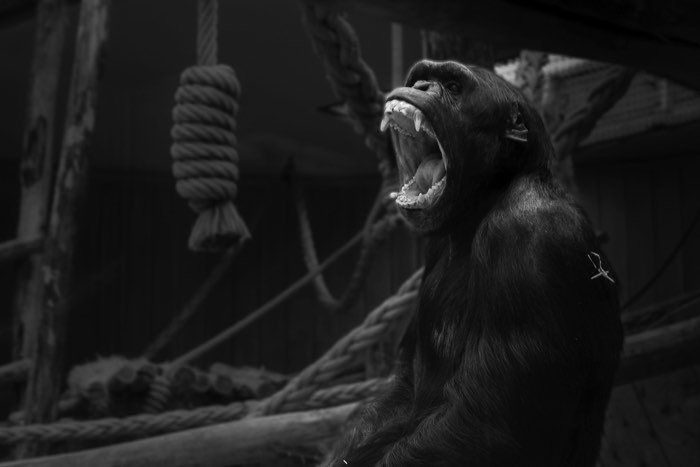
Here is my original shot of a gorilla behind glass in a Belgium zoo.
I converted this image to black and white. But with all the ropes and wood, the background is still distracting. And the gorilla gets lost in it all.
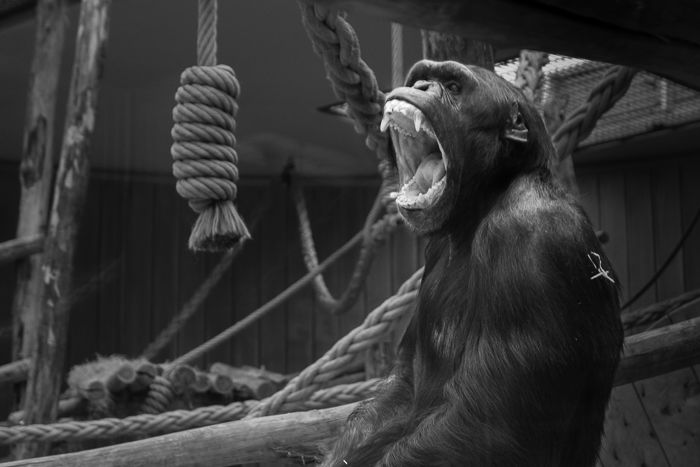
Let’s fix this using a digital blur effect to create a blurred background.
Blurring the Background in Lightroom Using AI Mask
If you have updated Lightroom Classic (after October 2022), you will have access to all of the new AI features! Here is a super-quick and simple walkthrough of blurring the background with these new tools.
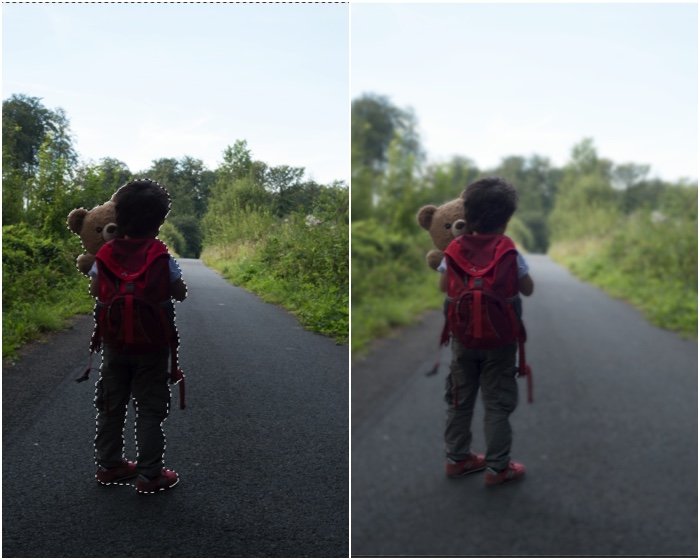
We will show you three options for masking to highlight the background. The first option is masking the subject and inverting the selection. This takes a bit longer. And it may need work with the Brush tool.
The second option is even quicker by using the AI background mask. And thirdly, if you have an older version of Lightroom Classic, we’ll show you the required brushwork and selections.
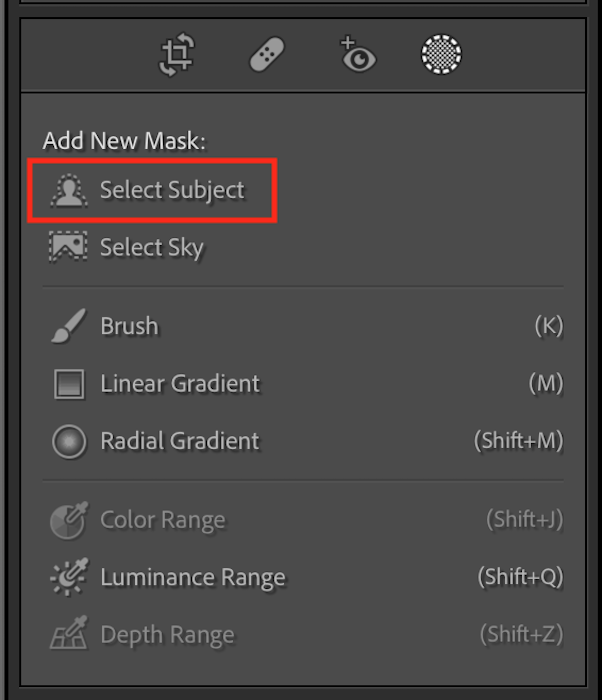
Step 1: Open the Image and Select the Masking Icon
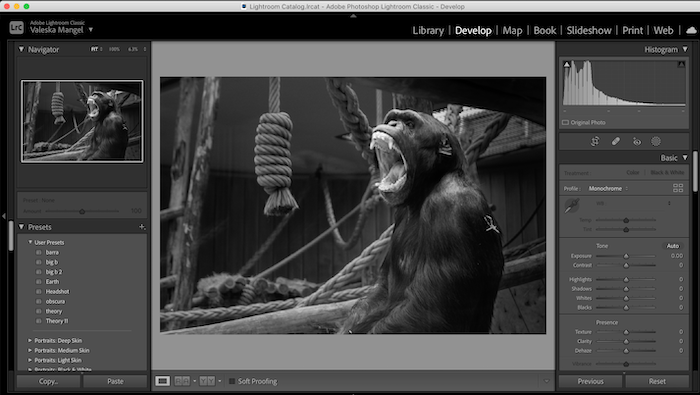
First, open your image in Lightroom and go to the Develop page.
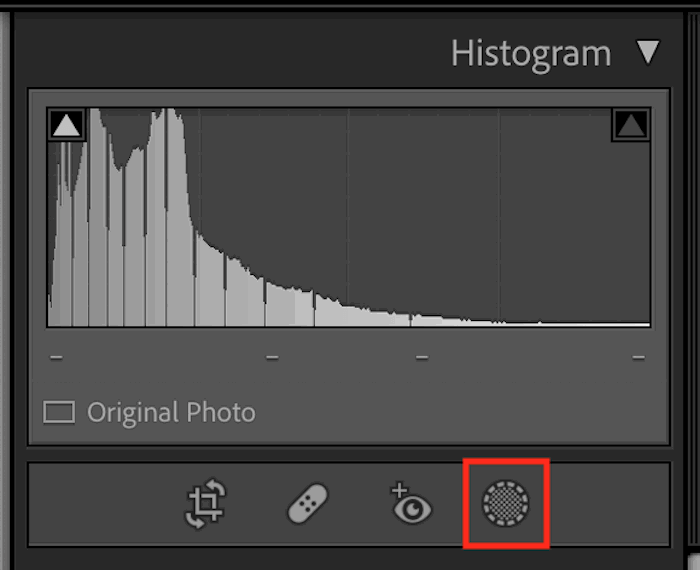
You will find a range of icons under the main histogram to the right. Click the Masking icon to begin or press Shift+W.
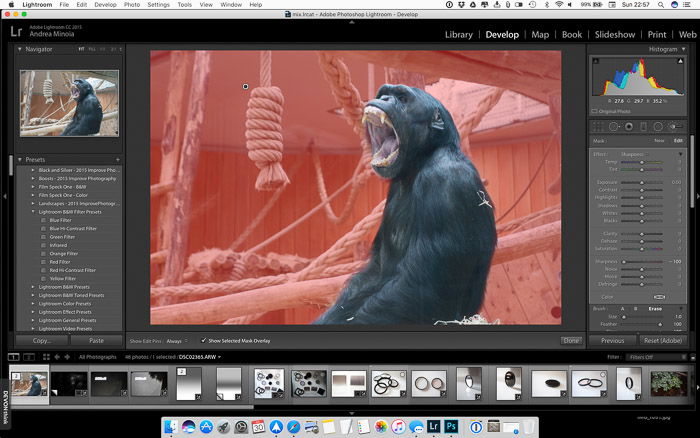
Step 2: Add a Subject Mask (Option 1)
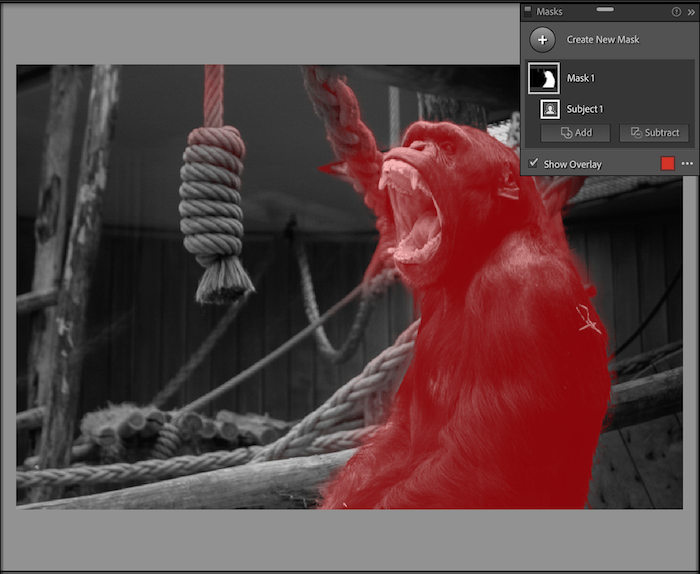
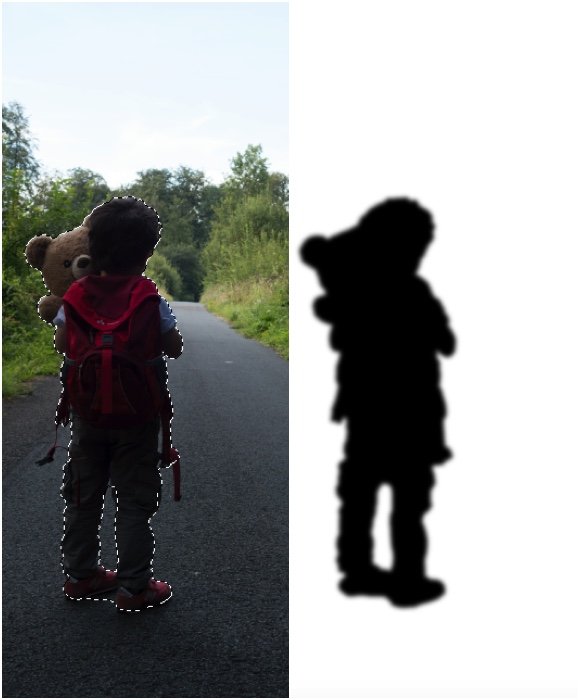
You will then get a range of options to apply a mask to your image. For our example, we will want to blur everything but the monkey. Therefore we will click Select Subject.
This will then apply an AI masking of our image. As the image I have used is black and white, it can be hard to identify the parts in the foreground and background. Surprisingly the AI has even noticed our rope is more in the foreground than other objects!
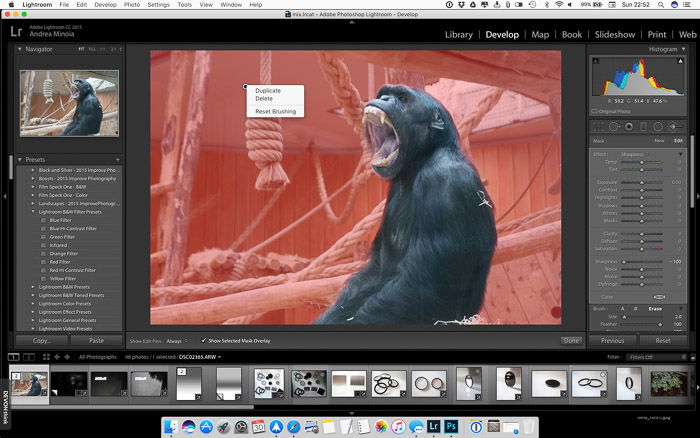
This is great, but I also want the rope to be blurred for this image. Here’s how to remove certain sections from your mask.
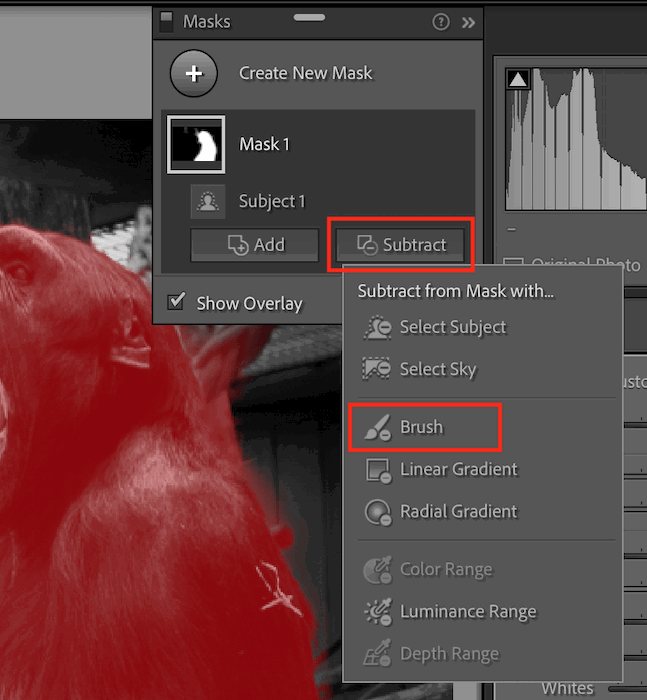
We will click the Subtract box in our current selection. And for this method, I will show you the Brush tool, as it is the easiest and quickest method.
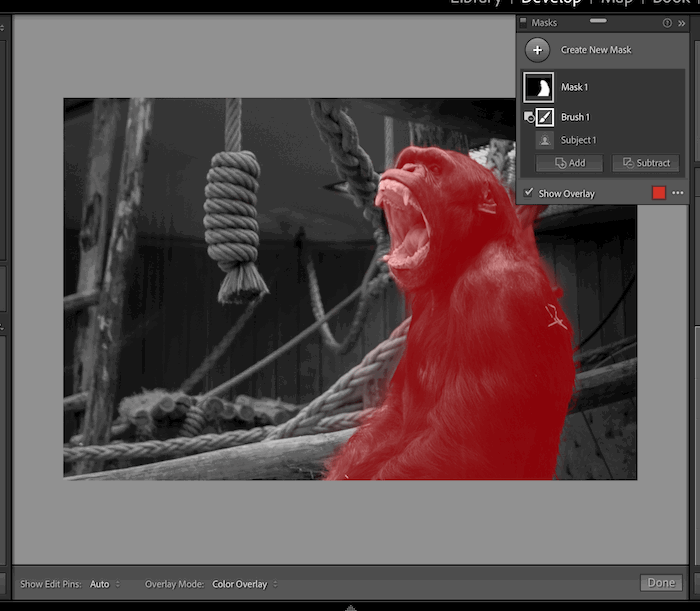
After selecting the Brush tool, brush over the parts you want to be blurred. Your image should end up looking like this.
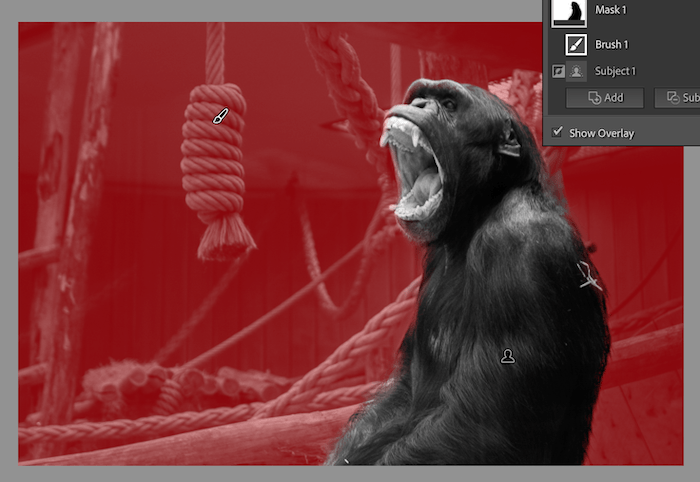
You can invert your selection when your subject is fully masked and ready. Do this by right-clicking on Mask 1 and clicking Invert.
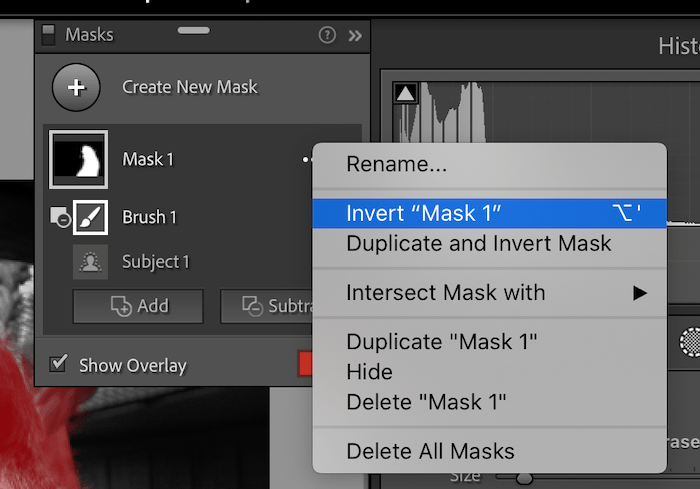
Your image should now look similar to this.
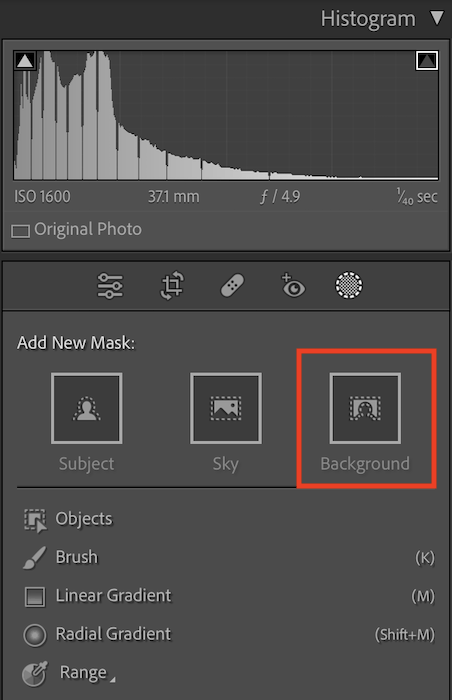
Step 2: Add a Background Mask (Option 2)
Those with the most up-to-date Lightroom Classic get a third option to mask the background. So click Background. The AI should automatically select the subject.
You will get the same result as the photo above—just quicker! And you can make the same brush adjustments as necessary.
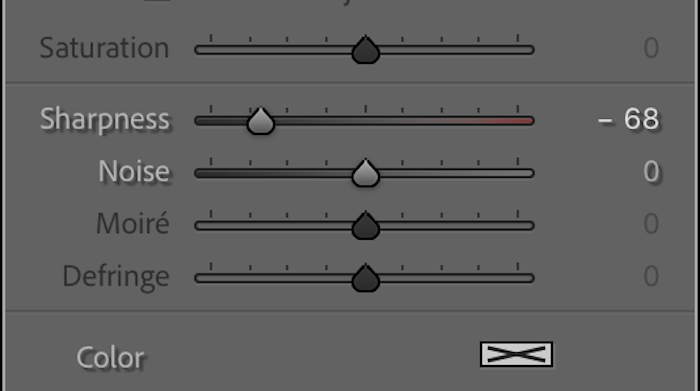
Step 3: Apply Blur By Reducing Sharpness Slider
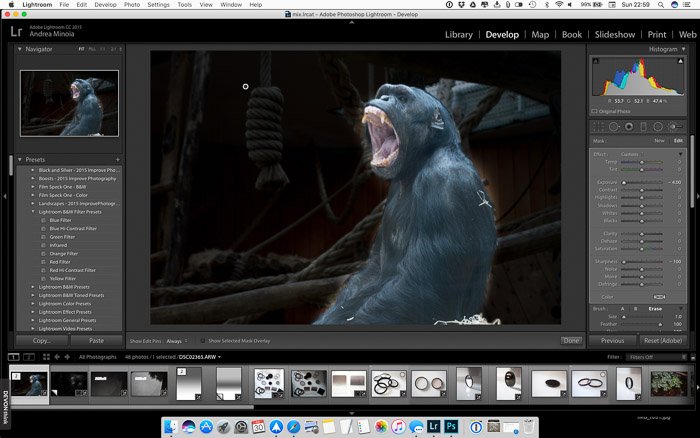
Now we’re ready to apply the blur to your image. You will see this range of adjustments you can apply to your mask in the Adjustments panel.
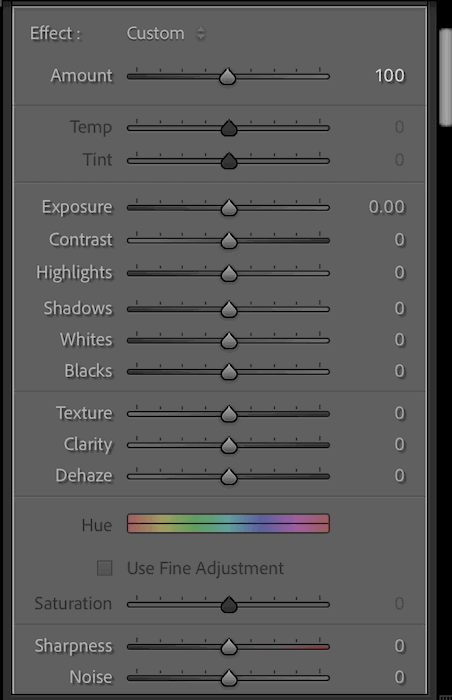
Look for the Sharpness adjustment. You can also play with the Texture and Clarity adjustments for a more subtle effect. To make the difference clear, I will move the sharpness slider quite far to make the subject pop.
Here is the final result (before and after). And it took me under two minutes to create!
If you don’t have the most up-to-date version of Lightroom, follow the instructions below!
Blurring the Background Using Lightroom’s Brush Tool
This is the third option for older versions of Lightroom without AI features.
The Brush tool is used to apply an effect to a part of your image.
- The mask part of the brush panel lets you create a new mask or edit an existing one.
- In the Effect section of the panel, you can choose a preset or manually create your effect.
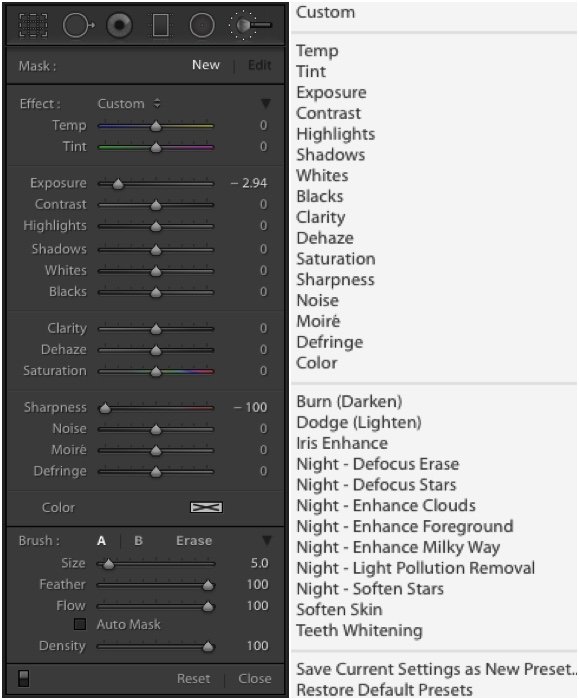
- The Brush section of the panel lets you define effects for two brushes
- The brush properties can be changed anytime and will not affect the painted parts.
And these are the brush settings you can apply:
- Size: Sets the relative size.
- Feather: Sets how soft or hard the brush is.
- Flow: Sets the strength of the brush. Use a value lower than 100 to slowly build the effect while painting in the same area.
- Auto Mask: Toggle on to help you to follow borders when you paint.
- Density: Sets a cap for the max strength of the brush.
Step 1: Open the Image and Select the Brush tool
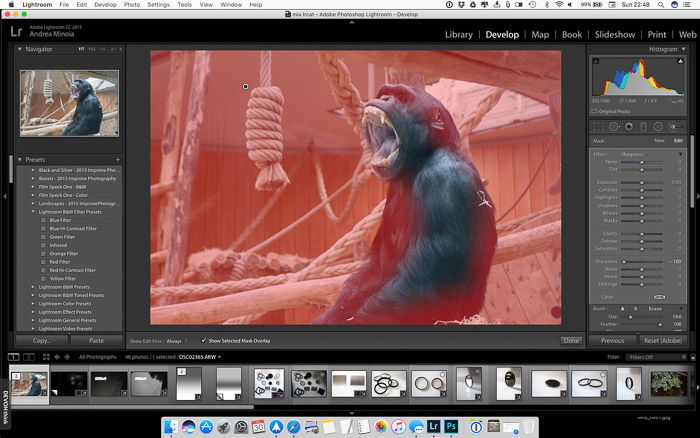
Open your image in the Develop Module of Lightroom. And select a sharpening adjustment brush tool.
Step 2: Adjust the Sharpening Slider and Paint the Background
Then crank the sharpening slider to -100 and start painting over the background. You do not need to be precise at this stage.
Use the keyboard shortcut “O” to show or hide the selected mask overlay (displayed in red). This way, you’ll see better where you are painting. While the mask overlay is on, the brush effect on the image is not shown.
Once you have a coarse mask, start working around the edges. Tune the Size, Flow, Density, and Feather of your brush to refine the mask edges. Sometimes, the Auto Mask option can help you with this.
Eventually, you might have to use the Erase brush to clean up your subject. That ensures that the blur effect is applied only to the background.
Remember that the amount of blur gradually increases with the distance from the focal plane for a realistic blur. All the objects on the focal plane must be kept sharp.
After a long paint-and-erase process, you have a pretty decent mask.
Step 3: Increase the Amount of Blur
Setting the Sharpness to -100 introduced a certain amount of lens blur, but not much. The good thing about Lightroom is that you can duplicate your adjustment brush by simply right-clicking on the brush marker and selecting Duplicate.
This new brush has the same settings and mask as the previous one. Be sure all the sliders are set to zero except Sharpness, which must be set to -100.
From now on, duplicate the brush as much as you need to apply the blur and build up the effect you are after. But be aware that having many adjustment brushes in an image will slow down Adobe Lightroom.
Step 4: Final Retouches
After blurring the background, you can duplicate the brush one last time. This time slightly reduce the clarity (set the sharpness back to zero) to accentuate the blur.
Next, you can use the global settings or other selective adjustment tools to make the final adjustments to your image.
When you are happy with your image, the only thing left to do is export the photo and share the results of your hard work.
Digital Blur Isn’t Always Ideal
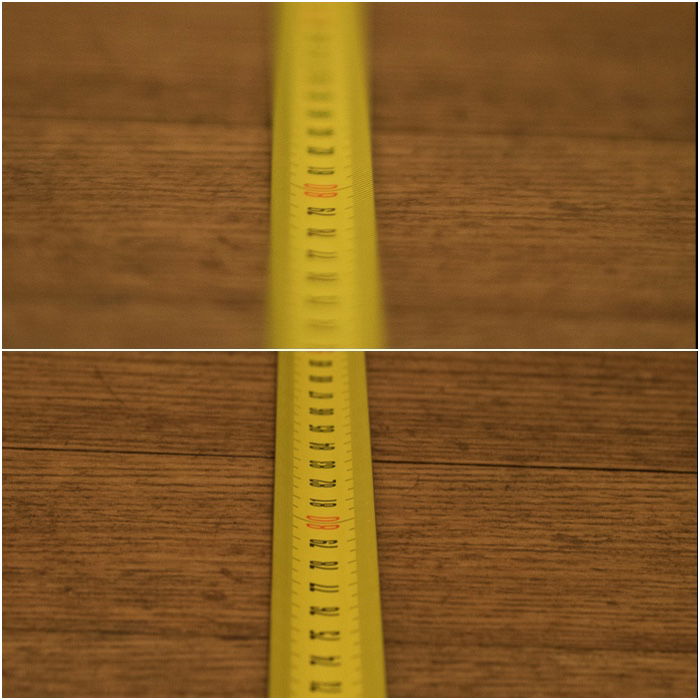
The main difficulty in creating a realistic digital blur effect lies in reproducing the gradual increase of the blur as it gets further from the focal plane, as seen in the example below.
Bonus Section: How to Get Blur Right In-Camera
Your camera sensor size will affect the depth of field. With a given combination of focal length, aperture, and subject distance, small sensors give a greater depth of field than larger sensors.
Depth of field can be modified by the following:
- Aperture: Double the f-number (e.g., move from f/4 to f/8), and the depth of field is also doubled
- Subject Distance: Double it, and the depth of field increases by a factor of four
- Focal Length: Double it, and the depth of field is reduced by a factor of four
Do you want to maximize the depth of field so that most of your landscape is sharp? Then you should use high f-numbers, a short focal length, and focus reasonably far away. A general rule of thumb says you should focus a third into the scene.
Or do you want to minimize the depth of field to better isolate your subject from the background and have nice bokeh? Then you should use small f-numbers and long focal lengths and move closer to your subject.
And there’s an option if you shoot portraits with natural light outdoors. Using a two- or three-stop neutral density filter, you can keep shooting wide open with fast lenses.
Finally, what if you cannot reduce your depth of field further but still need to blur the background? Your last option is to increase the subject-to-background distance, if possible.
Conclusion
We hope we’ve helped you create a beautifully blurred background using Lightroom. Check out our updated Effortless Editing in Lightroom course for even more Adobe Lightroom knowledge!
But don’t forget that you can minimize your depth of field by using the widest aperture. This way, you can get an even separation between your subject and the background without editing!