The landscape photography accessories you take with you into the field can make the difference between a successful and comfortable trip and a miserable and mediocre one.
Having the right gear will ensure the safety of your expensive gear as well as ultimately impact the quality of the images that you capture during your trip.
This is a fact often mistakenly overlooked by beginners.
Every photographic genre has its own ‘must-have’ set of accessories. Portrait photographers use light modifiers, landscape photographers should have at least filters and a tripod.
In this article I will discuss the most important aspects of the landscape photography equipment and the must-have accessories used in landscape photography.
To be clear, some of the gear I mention may be better suited to some kinds of landscape photography than others (Are you into coastal landscape photography? If not the special feet to stabilize your tripod on wet sand may not be as necessary.) but the range of accessories I mention should cover all the bases for your shooting needs in the general wilderness.
[ExpertPhotography is supported by readers. Product links on ExpertPhotography are referral links. If you use one of these and buy something we make a little bit of money. Need more info? See how it all works here. —Ed.]


The Best Landscape Photography Accessories for Photographers
The best set of equipment for landscape photography is the set you are willing to carry with you on every step of your photography trip.
Packing wisely is an art difficult to master, especially if you’re like me and want to have all your equipment with you—just in case.
The key to successful landscape photography trips is to know what kind of images you are after and to be comfortable out there. Not dragging around a ton of ‘just-in-case’ equipment is often a good start.
Also, remember that, on top of your photographic gear, you will have to carry stuff for your comfort too: water, snacks, clothes, first aid kit, etc.
The Must-Have Equipment for Landscape Photography
Tripod
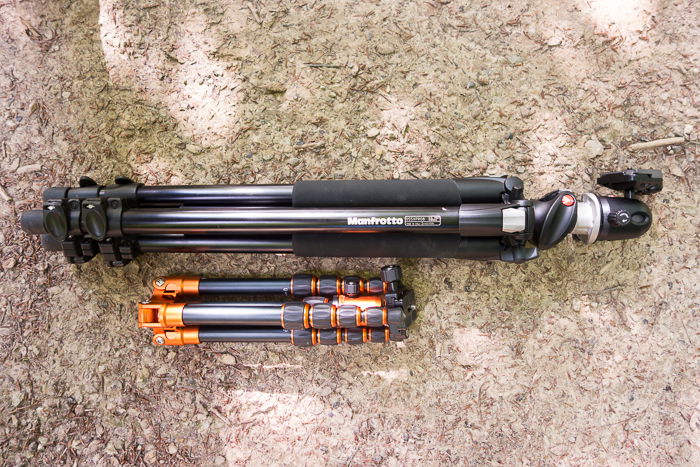
Tripods come in all sizes, weight and max load capacity: to ensure the best stability for your camera, get a tripod capable to support a max load that is 20-30% in excess with respect to the actual weight of your gear.
For an in-depth discussion on tripods and heads for landscape photography have a look at my detailed article on the topic here on ExpertPhotography.
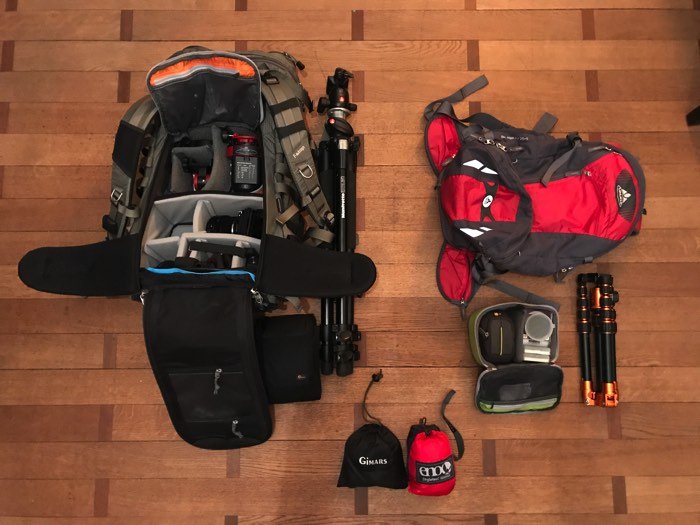
Camera Bags and Carry Systems
Choosing the right camera bag is crucial in landscape photography, both for your comfort and for keeping safe and dry your equipment. Never underestimate the importance of a good camera bag.
Here is a nice guide from Lowepro, a leader brand in camera bags and accessories, to help you identify the bag that best fits your needs. It is a nice starting point if you are on the market for a new bag.
For exploratory trips and shootings in location that can be easily reached, the best option is the classic camera backpack with a ‘day’ compartment for your personal items (water, snack, clothes, phone, etc.) such as the Lowepro Flipside Trek.
Avoid the so-called ‘messenger bags’, as they are not comfortable when fully loaded, because the weight is not evenly distributed on your back.
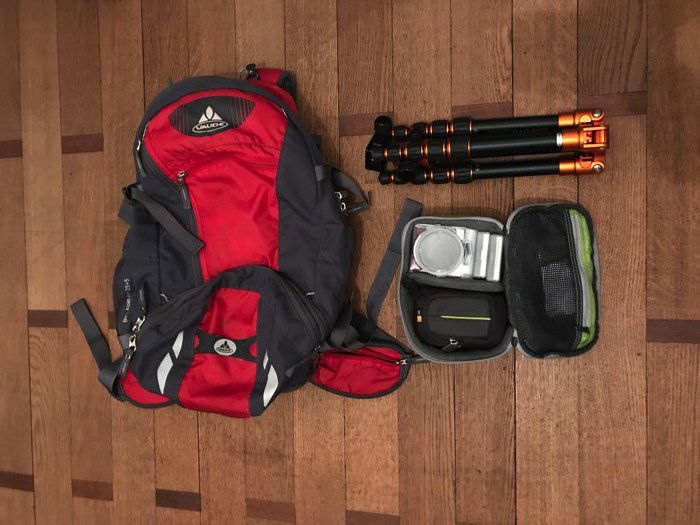
For more challenging photographic trips, with lots of hiking and/or camping, you should look into good quality mountain backpacks such those made by Deuter and Vaude or check the more photography-oriented F-Stop mountain series.
[Our recommendation: f-stop’s Kashmir UL backpack]
Those backpacks are made to allow you to transport heavy loads for long distances on rough terrain in the most comfortable way possible.
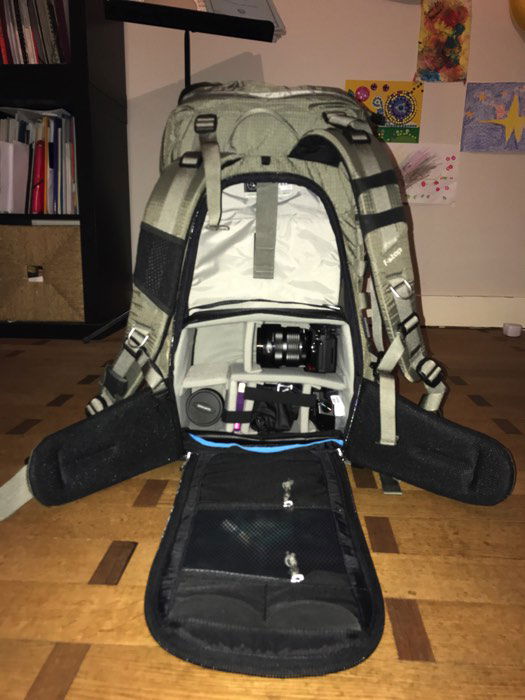
Internal Camera Units (ICU) are the best way to carry your landscape photography gear in a mountain backpack. F-stop makes specific ICUs that fit and are easily accessed while inside their backpacks, but can be used in backpacks from other brands as well.
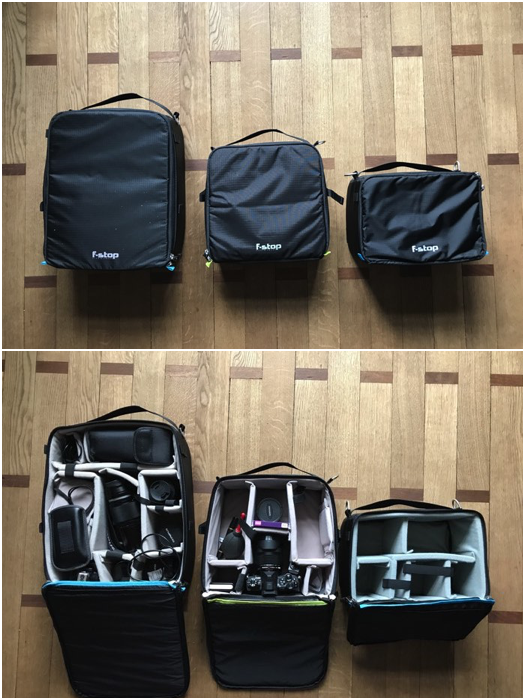
Choose the size of the bag and ICU according to your usual needs and avoid camera backpacks having no dedicated compartment for your personal stuff, as you probably don’t want to find yourself thirsty, hungry, cold, or wet in the wild with nothing to do about it.
Top-loading bags, coupled with a chest harness, allow to keep your camera out of the backpack and easily accessible while still offering a great amount of protection from rain and impacts. I could quite comfortably carry my old Canon 50D with the Sigma 70-200 f/2.8 zoom this way.
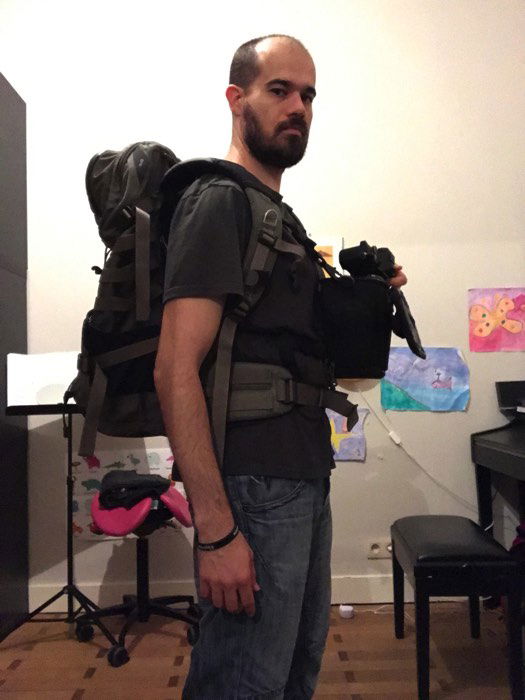
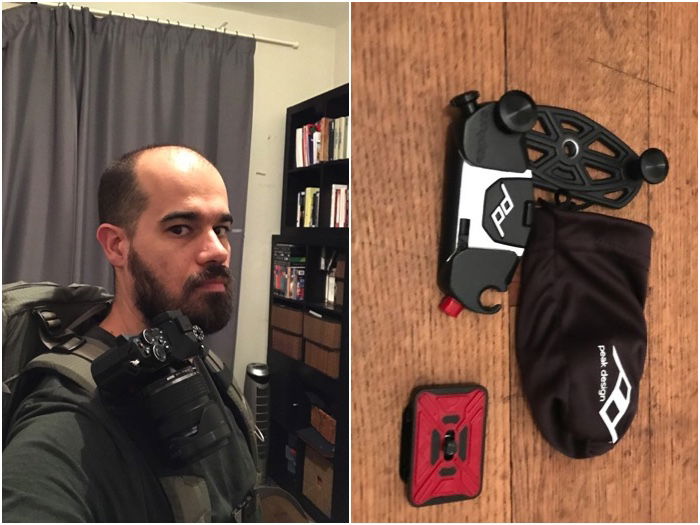
A clip system, such as the Capture Clips from Peak Design, allows you to carry your camera on the shoulder straps of your camera bag for quick and easy access, but this solution can be uncomfortable with large and bulky cameras or lenses and offers no protection for your gear.
Tip: Do not carry your camera (or a holster) around your neck, else I guarantee your neck will soon start to pain.
Must-Have Accessories for Landscape Photography
Here a list of the most common and useful accessories used in landscape photography:
Filters
You don’t go out there without filters, period. Filters are, in fact, the only way you have to shape that wonderful natural light you are after.
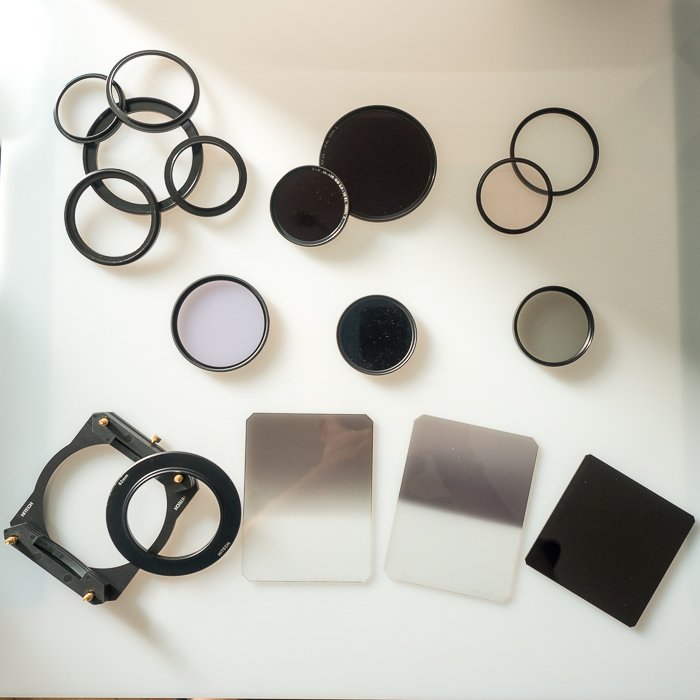
The most common filters are the graduated neutral density filters (GND), used to balance the exposure between sky and foreground.
Neutral density filters (ND), are used to do long exposures in daytime to blur moving water and clouds, and circular polariser filters (CPL) remove glares and reflections and darken the blue sky.
Protective Accessories for Your Camera
Some accessories are needed in order to protect your equipment from impacts and bad weather:
- Lens hood. Useful to reduce flares, it adds an extra layer of protection to your front lens element against impacts;
- Lens cleaning kit. It is dirty out there, so have with you a kit to dust off and dry equipment. A microfiber cloth, a rocket air blower and a lens pen is enough.
- Rain Sleeve. Camera rain sleeves are cheap and can protect your gear should you get caught under the rain. For extra protection against water and dust, you can fit a rubber band in the space between your camera body and your lens. (This creates a better seal against the elements.)
Remote shutter/Intervallometer
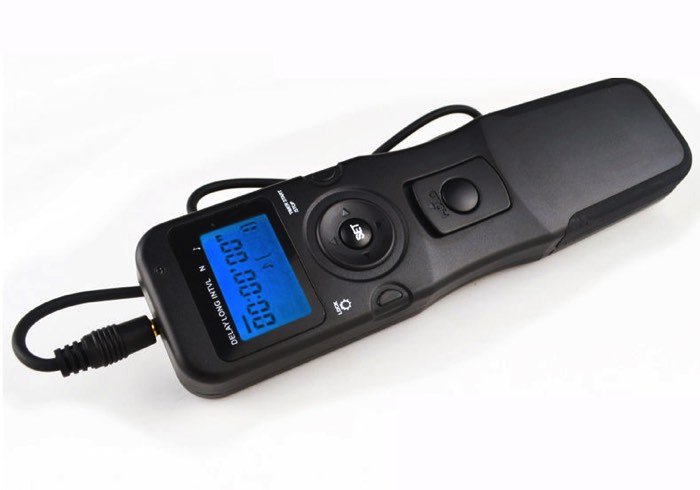
If you do not have these functions built-in your camera, you may want to consider getting a remote shutter/intervallometer.
It will reduce camera shacking and will allows you to be more creative with timelapse and long exposures.
Some cameras can be remotely controlled by a smartphone. While this is great, consider that turning on the camera Wi-Fi will reduce the battery life.
Spare Batteries and Memory Cards
Particularly with non-DSLR cameras, battery life can be an issue. This is because your LCD screen and electronic viewfinder can quickly drain your battery. Have an extra battery with you.
Tip: Fully recharge your batteries before leaving and, in cold weather, keep the spare battery on you in an internal pocket in your jacket to keep it warm and efficient.
Memory cards can get full or damaged. Have a couple more of those in the bag, and a weatherproof SD card case can provide an extra measure of safety.
[Our recommendation: Beeway Memory Card Carrying Case Holder]
Tip: Never put all your eggs in the same basket. If you are on a photography trip, avoid using a single, high-capacity, memory card: should it get lost or damaged, you will lose all your photos. Consider having a few ‘small’ cards, alternate them, and keep them safe in different places.
Plastic Zipper Bags and Silica Gel Packets
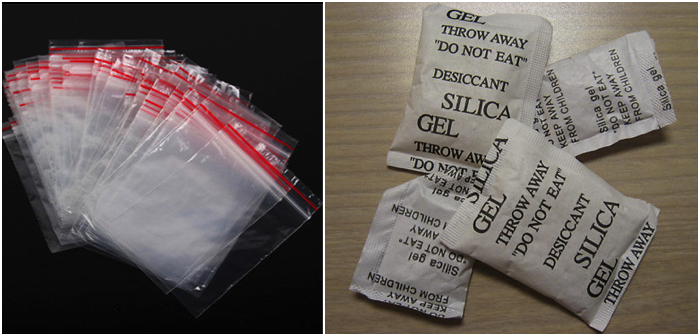
You can use plastic zipper bags to seal your camera before going indoors after being out in cold and humid conditions. This will allow the camera to slowly warm up preventing condensation to form. Alternatively, once inside, don’t open your camera bag/ICU until few hours have passed.
Tip: You may want to remove your memory card before sealing the camera, so you can review/edit/share your photos.
Tip: Save those little bags of silica gel you find when you buy shoes and other products. And put them in your camera bag. They will help to absorb moisture.
Tripod Feet
Even the strongest of the tripods needs to have good contact with the ground to be stable.
In some conditions, such as snow, mud, or wet sand, the standard feet on your tripod can sink. On rocks, they can slide.
Some tripods allow you to mount different feet for different terrain; Manfrotto, for example, is known to sell snow shoe and spike feet for their tripods.
Smartphone
Aside for safety reasons, your smartphone is a great tool as it allows you to:
- Check weather conditions in real time
- Navigate the terrain thanks to its GPS and follow previously loaded tracks to your locations
- Record GPS coordinates and tracks during exploratory trips
- Remotely control your camera
- Collect photos and videos for ‘behind the scenes’ documentation of your trip
- Plan where to go next thanks to apps such Photo Pills, Plan It! for photographers, The Photographer’s Ephemeris, etc.
- Navigate the night sky thanks to augmented reality with apps such as Sky Guide, etc.
- Read the pdf version of your camera owner manual, should you need it
Tip: A rugged, waterproof case for your smartphone is a welcome accessory.
[Our recommendation: Lifeproof’s line of phone cases.]
Landscape Photography Gear: Accessories for Comfort & Safety
Staying in the field all day long (or over multiple days) can be challenging. Here a short list of things you should do or have with you for your comfort and safety:
- Mobile phone & apps. Don’t go out without a phone and tell someone where you are planning to go. Even if you don’t have a smartphone, you should have a mobile phone with you. Some apps for smartphones, such as Road ID (iOS), automatically send a request for help to specific contacts at the press of a button or in the event you didn’t reset a timer.
- An old-fashioned map. A paper or plastic of the area where you’re shooting can help you find your way, even if your GPS/smartphone is out of battery.
- Multitool or Swiss Army-style pocketknife
- First aid kit
- Food and water
- Proper clothing. A rain jacket, fleece, and other items can be useful to stay dry and warm.
- Shelter. If you plan to hike for more days or to stay out all night doing astrophotography, bring a compact and lightweight solo tent or camping hammock and a sleeping bag.
- [Our recommendations: Ferrino’s Lhotse 3 or Coleman Sundome t tents; ENO’s DoubleNest camping hammock; Coleman Adjustable Weather sleeping bag]
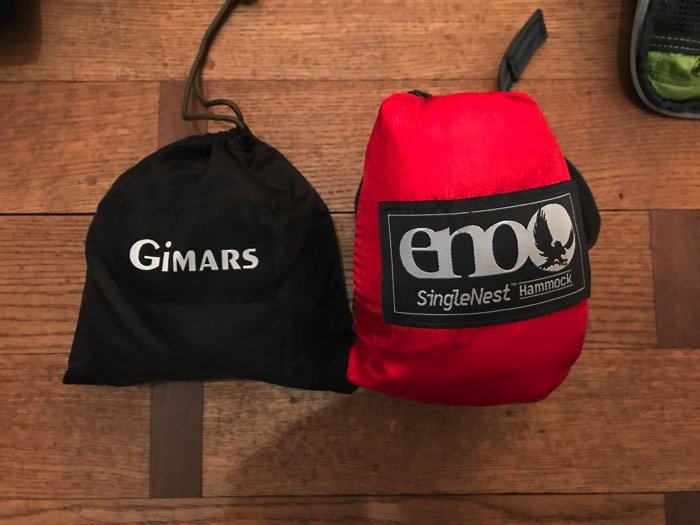
The author’s hammock and tree straps. A lightweight and compact solution to rest while in the field.
- [Our recommendations: Ferrino’s Lhotse 3 or Coleman Sundome t tents; ENO’s DoubleNest camping hammock; Coleman Adjustable Weather sleeping bag]
- Head lamp. This will help you see what you are doing and where you are going while keeping your hands free as you shoot night landscapes.
- Power bank. Power banks will allow you to recharge your GPS, smartphone, head lamp, and compact camera while in the field. Useful for long expeditions. You can couple it with a portable solar panel.
Conclusion
Landscape photography is a exciting and rewarding activity, particularly if you love finding images in the great outdoors. Now that you know what to pack, go grab your landscape photography accessories.
Enjoy your adventure in the wild. And don’t forget to be safe.