If you’re looking to take your landscape photography skills to the next level, then you need to learn about landscape camera modes. A good landscape camera mode can make all the difference between a good photo and a great one.
In this article, we’ll show you some of the most common landscape camera modes and explain how to use them. We’ll also provide some tips on how to adjust your light sources to create different types of effects.
Automatic Landscape Camera Mode
Usually relegated to the “beginner” automatic is actually a usable and effective tool. Automatic (indicated by a P for “Program” on most camera systems) puts the camera in charge of everything but your composition. Exposure (aperture and shutter speed) is selected by the camera.
You simply point your camera, and shoot. This is the pitfall of automatic, as it can become a crutch.
Many cameras also have a full-auto setting indicated by a green rectangle on the dial. This is the point-and-shoot mode that usually only allows recording in .jpeg. The camera is in control of ISO as well as shutter speed and aperture. If you want to photograph in RAW be sure to use P not the rectangle.
When you need to work fast, when the light is shifting, or you are trying to grab a shot quickly, then by all means resort to auto. It’s easy, but you also have very little control. Most of the time, landscape photographers want control.
You will realize very quickly that Automatic, for all its ease, won’t give you what you want. That’s when you might migrate to one of the other modes.
Aperture Priority Mode
Aperture priority mode is my personal default setting. In this mode, you control your aperture (f-stop) and the camera takes care of the shutter speed. The aperture of your lens controls the amount of light that reaches the sensor and the depth of field (DOF).
The DOF is the amount of your scene from front to back that falls into focus.
A fast Aperture, say f2.8, will have a relatively narrow DOF. A slow aperture of f22 will show most, if not all, of your scene in focus from foreground to background. The actual DOF depends on your lens and its focal length.
In landscape photography, you often want to maximize DOF. That’s why Aperture Priority Mode is so important. With a spin of your camera’s dials, you can control the DOF, expanding or contracting it to meet your needs.
The drawback is that, as you adjust your aperture, your shutter speed will need to change to compensate. It’s important to understand shutter speed, and its impact on your image.
Shutter Priority Mode
Shutter Priority allows you to control the camera’s shutter speed, leaving aperture settings up to the camera. I use this setting less frequently than Aperture Priority, but it can be very useful.
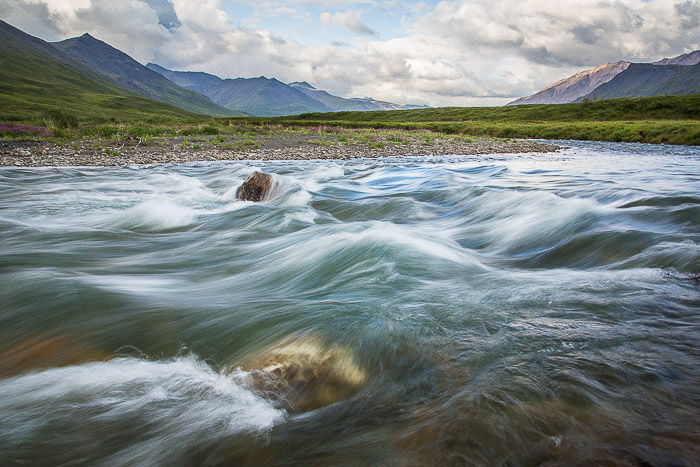
Shutter speed is the length of time your shutter remains open during an exposure. In landscape photography, this interval can have a major impact on your final image. A slow shutter speed will cause moving objects to blur, while a fast shutter speed will freeze motion.
I frequently use long shutter speeds to motion blur fast-moving rivers and streams. For most of my landscape images that involve motion, I use a slower shutter speed to emphasize that sense of movement. The longer exposure also means I can use a higher f-stop, allowing for a wide DOF.
Manual Mode

Manual mode puts everything in your control. I’ve encountered comments online saying professionals photographers only use manual settings. Rubbish. Manual Mode is useful, but it is also finicky, and more prone to error.
It is important to understand how to use it but it is not the end all, be all, of professional photography.
With both aperture and shutter speed in your control, there is no room for error. Rarely do I find the necessary fiddling up and down of settings to be a good use of my time. I find that I’ll use manual settings only in a few specific circumstances:
- Panoramas: After you select the proper exposure, put your camera settings to manual mode to avoid changes in brightness from one image to the next.
- Time lapse video: Automatic settings would change with each new image in the series, wrecking the continuity of the time-lapse.
- Bulb Exposures: Bulb is when you manually set your shutter speed open for an undetermined time, usually over 30 seconds. In such cases, your camera will not be able to meter effectively and you’ll need to find the appropriate aperture yourself.
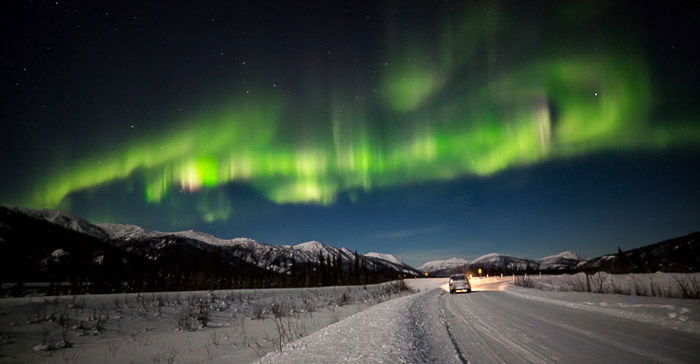
- Night Photography: When I’m shooting the aurora borealis or star scenes in very dark conditions, I’m going to keep my aperture wide open. I can set the f-stop and then leave it, adjusting only shutter speed on the fly.
Conclusion
Of the four modes I note here, most of my shooting happens in either Shutter Priority or Aperture Priority. If you understand these two, and the impact they have on your photos, then you will have a strong grasp on the art of exposure. Experiment with the settings, practice, and play with them.
Once you understand how the different priority modes offer you control over your images, you’ll avoid the traps I fell into during my early days as a photographer. When the light is right, and your subjects come together, and the landscape is bright and beautiful before you, you won’t have to guess.
If you know your shooting modes for landscape photography, and how to use them, you’ll be on your way to better images.
Need a bit more detail on what each mode controls? We have a rundown of the details of shooting modes