If you’re looking to take your landscape photography skills to the next level, then you need to learn about landscape photography camera settings. A good landscape camera mode can make all the difference between a good photo and a great one.
In this article, we’ll show you some of the most common landscape camera modes and explain how to use them. We’ll also provide some tips on how to adjust your light sources to create different types of effects.
Landscape Photography Camera Settings for Perfect Exposures
The ideal exposure comes from a combination of things: the camera’s metering, the settings you choose, and your personal vision. There is no such thing as “correct exposure”. What is right is what YOU want, not what someone else wants.
You will find many articles that will describe in detail the “proper” way to expose a landscape photograph. They may tell you how your histogram (see below) should look, or what is right for RAW vs. JPEGs. I call hogwash on all that.
The trick to good exposure for landscape photography is knowing how to attain what you envision.
Metering Modes for Landscape Photography
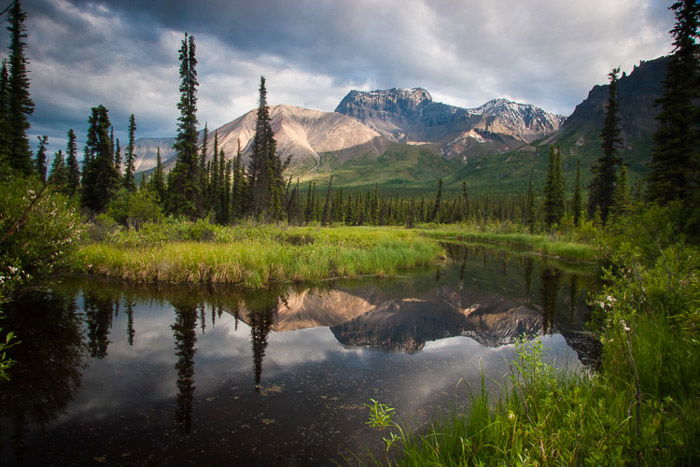
Take a moment and imagine a landscape. Any will do, but imagine it in some detail. The sunlight, the shadows, the bright reflections off the water, the sun itself, the dark mountains. Picture all the diverse and juxtaposed areas of brights and darks that make an image compelling.
As lovely as these are to the eye, they are a nightmare for your camera. The meter has to look at all those lights and darks and decide on an exposure to capture it. It isn’t easy, and the camera needs your help to make that decision.
There are three primary metering modes used by most manufacturers. Here is how they work.
Evaluative Metering
In Evaluative Metering, your camera will decide on an exposure based on what is happening in the entire frame.Evaluative metering takes the entire landscape as viewed through your viewfinder, and decides on an average for the scene. This would seem like a great way to approach landscape photography, but it also has drawbacks.
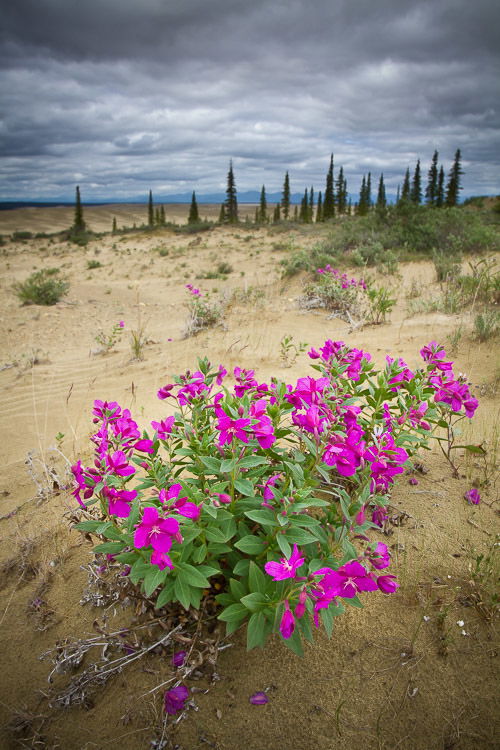
Evaluative metering would work great for a landscape with relatively low contrast, like a forest on a cloudy day. It draws on overall average so it would help you get the exposure you want.
Now imagine a landscape with a very bright sky and shadowed, dark mountains in front. An average of that scene, half sky, half land, may yield an image with neither the mountains nor the sky appropriately exposed.
Center-Weighted Average Metering
As opposed to evaluative metering, center-weighted emphasizes the central region of the image.
Most often, the important part of our images will fall somewhere in the central part of the frame. It may be slightly off to the side, but your subject is unlikely to fall on the very edge. This makes center-weighted metering a useful tool.
Spot Metering
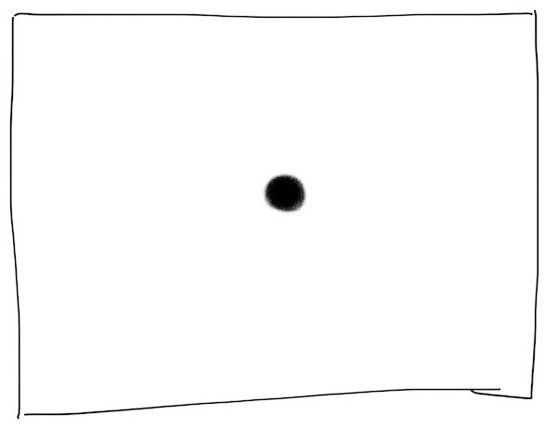
When using Spot Metering, your camera will use just a single point to select the exposure.
Consider Spot Metering the sniper shot of metering modes. Center Weighted is the shotgun, and Evaluative Metering the nuclear bomb. Spot Metering for landscape photography is a precision tool: you select the brightness of a very small part of your frame.
Most cameras meter off the autofocus point. Your camera will select the appropriate exposure for that spot and ignore the rest of the composition. If you want to make sure your exposure is right for your subject and don’t care about the rest of the image, this is the perfect metering mode.
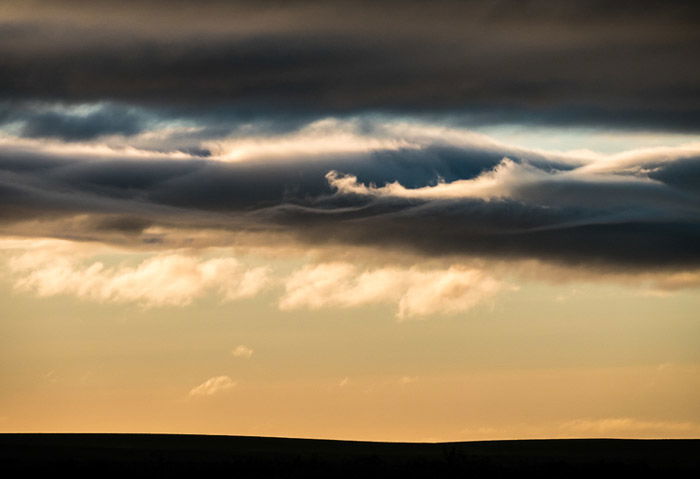
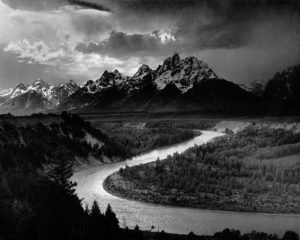
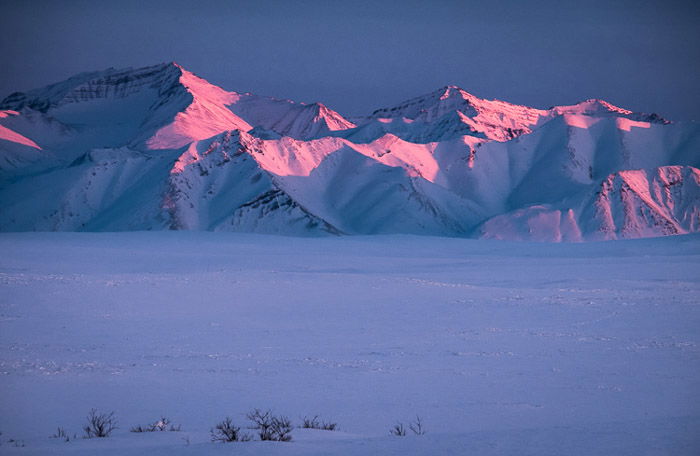
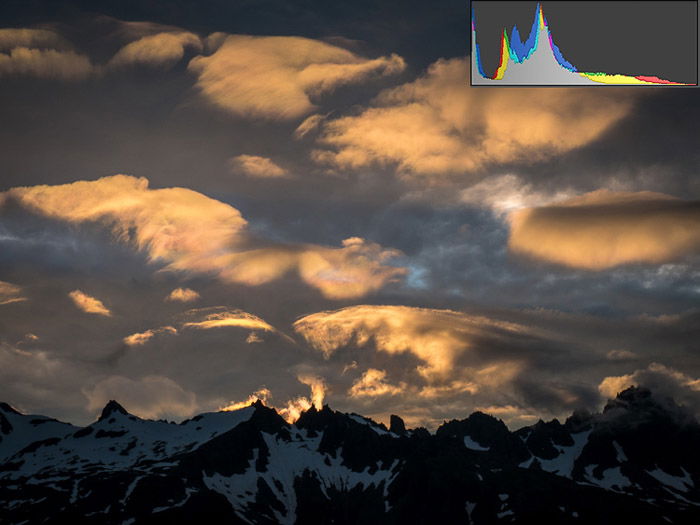
In the above high-contrast scene, I used Spot Metering to select for the bright part of the sky. This pushed the foreground to black. I sacrificed foreground detail to retain color and texture in the sky, and Spot Metering allowed me to do that easily.
I almost always use spot metering. I use it to meter off my subject, or some neutral brightness spot nearby. Like the rifle shot, you can miss sometimes, but when it works, it works with precision.
The Histogram

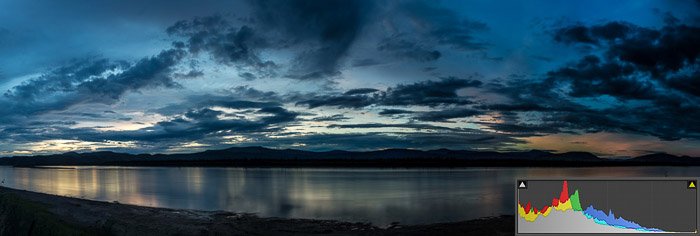
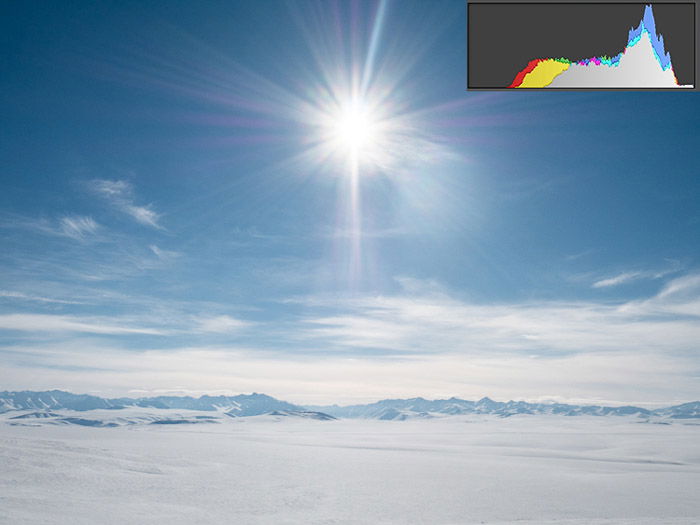
The histogram may be the single-most important tool in assessing exposure. A histogram is a graph showing the distribution of brightness across the image. If the graph is pushed to the right, the image is bright; to the left, and it’s dark.
Clip the graph off one side or another and parts of the photo have gone to pure (unrecoverable) white, or pitch black.
A quick note about camera sensors.
Sensors can capture the most data on the right (bright) side of the histogram. If you “expose to the right” so the distribution of light is mostly bright, your RAW image will hold more data and detail than if you expose to the darks.
If you post-process your images, “exposing to the right” also lets you adjust brightness without introducing unwanted noise.
I use the histogram almost all the time. When shooting with my mirrorless cameras, I set my camera to show a live display of the histogram. Like that, I can adjust exposure on the fly.
With my DSLR, I review the histogram after each series of shots. If I need to change anything, I can do that before I move on to the next composition.
Exposure Compensation
One final tool at our disposal is not strictly a setting, but useful just the same. That is Exposure Compensation.
Every DSLR and mirrorless camera is equipped with the ability to adjust your exposure up and down with the flick of a dial or the push of button. This is incredibly helpful, and I cannot emphasise how important it is for you to learn how to use this tool.
While making images, if you find that your photo is too dark or too bright, you can use Exposure Compensation to quickly add or subtract light. Whether you adjust your shutter speed or aperture to do so, will be up to the setting you are using. In aperture priority mode, for example, your shutter speed will adjust leaving your aperture setting intact.
Like the histogram, I use Exposure Compensation constantly, shifting brightness up and down until I find just what I’m looking for. Learn it on your camera, and use it. You’ll love it.
Conclusion
There are a lot of tools at your disposal when it comes to landscape exposure techniques. You can use metering modes, shooting modes, DSLR settings, and the histogram. They each have a role to play in your image creation process. Undoubtedly, you’ll find some more useful than others.
The important thing is to learn how they work so that you can then forget about them. Like all your camera settings, these should be instinctual, so you don’t have to think about it when you are actually making photos.
At the start of this article, I said that landscape photography is about interpretation. In order to interpret the scene in the way you want, you’ve got to know your camera. Getting that perfect exposure you want is right up there with composition as the two most important skills in the photographer’s quiver.
If you can’t get these two things right, it doesn’t matter what kind of gear you have in your pack. Learn them, try them, and see how your images improve.