DxO PhotoLab 6 is the latest editing app from the French software company DxO. It aims to be “the most advanced, end-to-end, RAW photo editing software” on the market. So let’s unpack those claims and take a look at DxO PhotoLab 6 and what it can (and can’t) do.
There’s no doubt that Adobe’s Lightroom is the dominant force in the field. And it is no easy job to persuade a busy photographer to switch from the familiar to something new. So DxO has quite the task ahead of them.
Overview of DxO PhotoLab 6
DxO PhotoLab 6 is designed to work with RAW images. But it will happily handle JPEG and TIFF files. Its main features and benefits are:
- Extensive Optics Modules for camera and lens corrections
- Unsharp mask
- Moiré tool
- Denoising—including AI-powered DeepPRIME XD mode
- Geometry corrections
- Luminosity and Contrast adjustment
- Atmospheric haze reduction
- Color editing—including camera-profile-based editing
- Soft proofing
- Downloadable ICC profiles
- Crop, Horizon, and Perspective Correction tools
- ReTouch tool
- Local Adjustments
- Catalog-free workflow
- Presets
- Nik Collection plugins
That’s a pretty extensive list of features. Let’s look at using the software in action.
Installing DxO PhotoLab 6
Installation is pretty simple. I tested DxO PhotoLab 6 on a late 2015 iMac, with 16 GB of DDR3 Ram and a 3.2 GHz Quad-Core Intel Core i5 processor. It has a 1 TB Fusion Drive. I’m running MacOS Monterey (12.6.3).
The first thing I noticed about PhotoLab 6 is that it doesn’t take up a lot of space. The installation took up 1.1 GB of hard drive space. That’s small compared to the 2.6 GBs for Affinity Photo and 6.5 GBs for Luminar Neo.
Once you’re ready to go, you are presented with the PhotoLab workspace. You can choose between Standard and Advanced. The main difference is the number of options on the right-hand side.
Make sure you select the PhotoLibrary button in the top-left corner. This takes you to a familiar folder hierarchy of the files on your computer. There’s no need to move your photos anywhere else to use PhotoLab 6.
As you work on them in the editor, PhotoLab creates a new file with the .dop extension. So myphoto27.JPG becomes myphoto27.JPG.dop. This is how the app keeps its edits non-destructive (until you export the photo).
When you click on the folder with your photos, they all appear in the central part of the workspace. When you double-click the one you want, it shows up in that same central area. And the key information and controls surround the image. And below is a ticker of the other photos in that folder. It’s all pretty clean and easy to work out.
DxO PhotoLab 6’s Workspace
One of the pleasures of working with PhotoLab 6 is how easy it is to customize the workspace. The Palettes menu allows you to select any or all of the 14 available palettes. These include light, geometry, histogram, keywords, and metadata.
Information tends to be on the left side of the screen by default. But you can drag each palette where you want it. I quickly settled on the Histogram, Metadata, and History for the left side.
That means the adjustment palettes are on the right. These are divided into Light, Color, Detail, Geometry, Local Adjustments, and fx. They sit there completely visible in both a collapsed or expanded view. Or there are six buttons with those categories that limit the visible palettes to that area.
Across the top of the workspace are buttons to return to the library. There’s a before/after compare button and a slider control for live comparison. With both those comparison options, you can choose to remove geometry corrections and see only other corrections.
Finally, there are quick-access buttons to some common tools. These include the Color Dropper, Horizon Leveler, and Perspective tools to name a few. It’s a neat, easily accessible workspace with tons of customizable options.
Editing With DxO PhotoLab 6
Let’s look at what it’s like to actually edit a photo with PhotoLab 6. I’ve worked on a number of images. Some were taken years ago with a Canon EOS 400D/XTi, some with an EOS 5D III, and some with an iPhone 6. This gives a nice variety of equipment. I also used a wide selection of RAW and JPEG images.
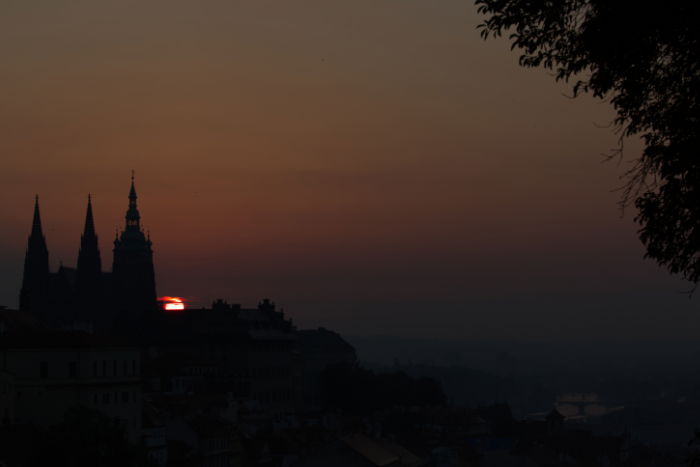
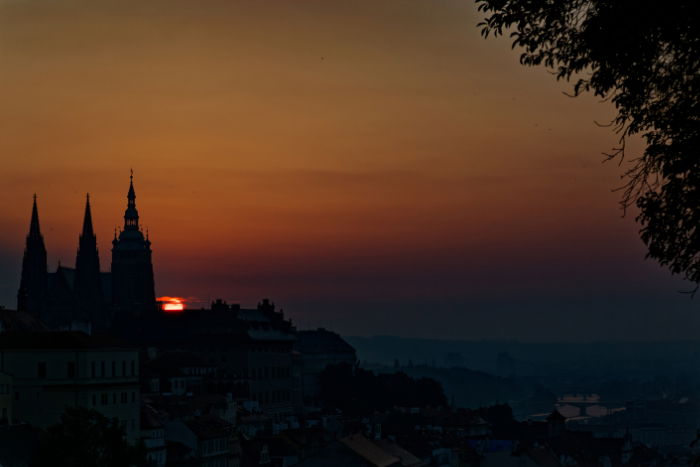
The corrections I applied here lift the foreground and the river. And it still intensifies the eastern sky behind Prague Castle!
Masking
Masking is available in the Local Adjustments tab. You can adjust masked areas for lighting, color, and sharpness. Auto masking allows the app to expand the selection to naturally surrounding areas. It’s not something I found a great deal of use for, but that might change over time.
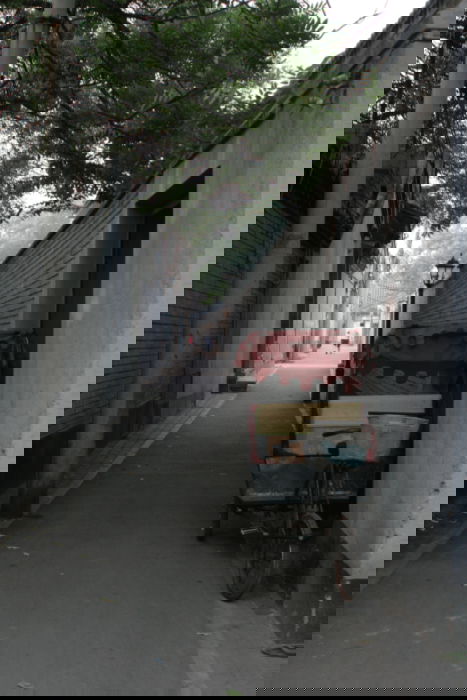

Even for someone who is new to the software, it was easy to select the rickshaw as a mask. The other adjustments enhanced the contrast and color. They also increased sharpness and used ClearView Plus. This helps eliminate haze, which can easily be seen in the next photo.
ClearView Plus
Beijing in July is as humid as an indoor swimming pool. DxO PhotoLab 6 helped me rejuvenate a bunch of photos I took there years ago. There were several obstacles including haze, an APS-C crop sensor camera, and a slightly moldy lens.
ClearView Plus helped fix many of these problems. This next photo was one of my favorites for composition and using the compression effects of a 300mm lens (480mm on the APS-C). But it lacked punch and suffered from the atmospheric haze.


It’s impressive how easy it is to enhance your photos. I played with this image on my usual photo editing software and couldn’t do as good of a job as PhotoLab 6. And PhotoLab 6 was quicker!

Cropping and Toning
We all know how frustrating it can be when the photo doesn’t match the idea in our head. PhotoLab 6 makes toning the photo into black and white easy. And cropping is very easy, too.
I wish I shot this Parisian cafe in black and white. And none of the compositions were quite what I wanted. PhotoLab 6 made it easy to create the image I originally planned.
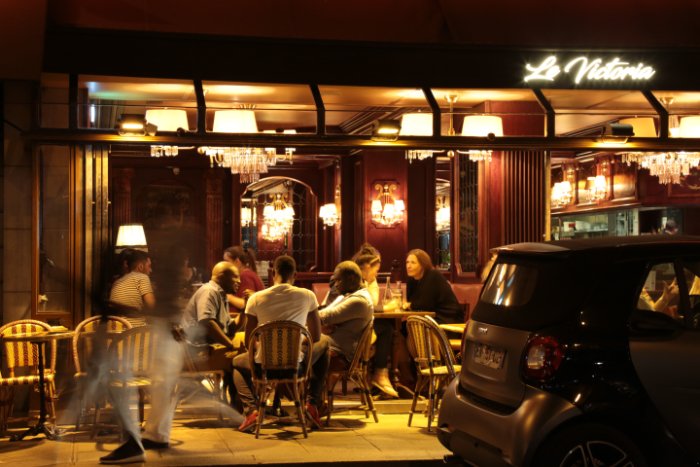
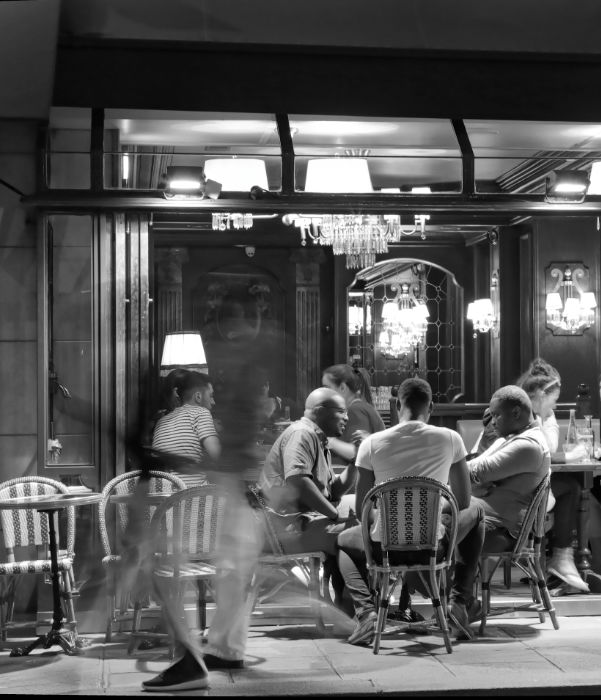
Image Correction and Enhancement
Not every edit we make is so drastic. Sometimes we just need to tweak something to make it look better.
I used PhotoLab 6’s suggestions to make this scene “pop.” It also applied lens corrections based on its downloaded profiles for my camera and lens. You’ll see that it subtly corrected the pincushion distortion in the after photo below.


You can always access the before and after images in PhotoLab 6. All you have to do is press the Compare button. Or you can activate the slider view that compares photos via sliders (like the photos in this article). All edits are non-destructive, so you don’t need to worry about the original.
Correcting lens distortions is simple for most lenses because DxO has downloadable profiles. Rather neatly, they don’t install everything when you get the software. Instead, they prompt you to install the appropriate profile when you start working on a photo that uses a camera or lens you haven’t edited before.


This photo shows PhotoLab 6’s lens correction and how well it can rescue detail from underexposed areas. Especially if your camera has a high ISO invariance.
This photo also demonstrates PhotoLab 6’s AI-powered denoising. There are four levels available. The lowest is the only one that will work with JPEG images. PRIME, DeepPRIME, and DeepPRIME XD only work with RAW images.
You can see from the detail of the table leg below that DeepPRIME XD does a pretty impressive job of removing noise.


This particular image was actually a -2 stop underexposure for an HDR merge. But PhotoLab 6 rescued it as a standalone image.
HSL Adjustment
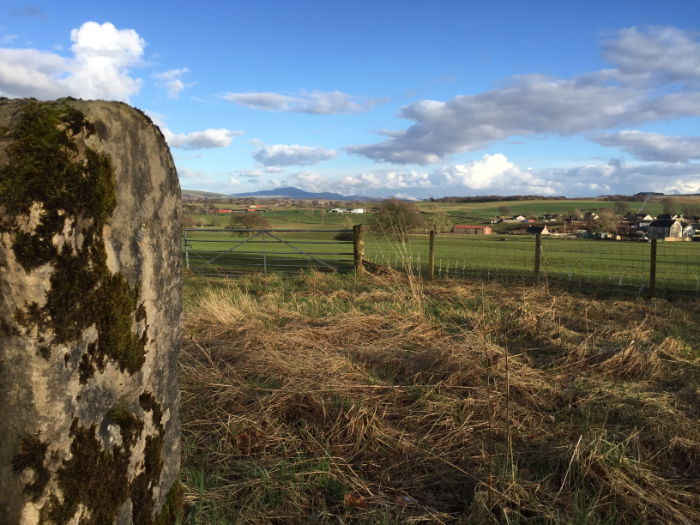
You can individually adjust hue, saturation, and luminance across nine channels. This allows for some of the more subtle edits we need to lift an ordinary photo to the next level.
By selecting the two blue channels, I was able to slightly bring up the sky in this Scottish landscape. It also shows that PhotoLab 6 will be just as useful if you’re shooting on a phone. (This was an iPhone 6.)

Local Adjustments
Local adjustments make it possible to edit selected areas of an image. It can help overcome exposure problems in tricky situations. The original image here is decent. But to expose the flames correctly, the cocktail was always going to be a little dark.
This was easily fixed with a local adjustment of exposure, contrast, and intensity.


Ease of Use
I’m most impressed with how easy it is to learn PhotoLab 6. It will seem natural to anyone who has any photo editing experience. It is not overly complicated. And you can quickly enhance your photos with ease.


Most importantly, the results are extremely pleasing. It’s possible to overcook the edits, of course. But that is true of any software. But tastes also vary. And I have been won over by the subtle but important changes the PhotoLab 6 six makes possible. And not just possible, but easy too!
What About Presets?
You won’t be able to use your Lightroom presets with PhotoLab, if you have them. But PhotoLab 6 has an easy preset builder that you can use to create your own. And they’re very easy to apply once they’re built.
DxO is also the proud owner of the NIK collection of presets. That will form the basis of a whole review in the near future. PhotoLab 6 provides simple access to the whole collection, integrated within the editor.
Conclusion—DxO PhotoLab 6
I am impressed with DxO PhotoLab 6. It makes editing and enhancing your photos easy. And it produces results that make the (slight) effort well worth it. If it lacks anything, it is probably a Background Removal tool. But this is a small thing.
Otherwise, it offers a powerful suite of tools. I am particularly impressed with the ClearView Plus feature. I have a ton of pictures that I want to revisit and enhance with PhotoLab 6. If you shoot RAW, you’ll find that the AI noise reduction is extraordinary. The ability to rescue images is such a bonus.
It also means that where you might hesitate to use the absurd end of an ISO range, it’s now an option. After all, we don’t have AI (yet!) that will remove camera shake or motion blur. You can shoot those low-light scenes with a fast enough shutter speed in RAW. Then just let PhotoLab 6 take care of the noise.
It took me literally only a few hours to get to grips with the components. The art of enhancing photos is often one of subtlety. Sure, cropping and toning the Paris cafe image make all the difference. But sometimes it’s a small change here and there that lifts a photo.


I’m sold on PhotoLab 6. I find it more intuitive than Affinity Photo (which I also rate highly). If you’re looking for a photo editor with AI-enhanced features, it’s definitely worth a look. Especially if you want to steer clear of a subscription model.
For more alternative options, you can look at Luminar NEO and how it compares to Affinity Photo.